Embossed Gel Patterns: Elegant Raised Designs That Look Like Luxury Fabric
A practical Sofia K. technique tutorial on embossed gel patterns and raised luxury-fabric nail designs.
Some manicures sparkle.
Some shine like glass.
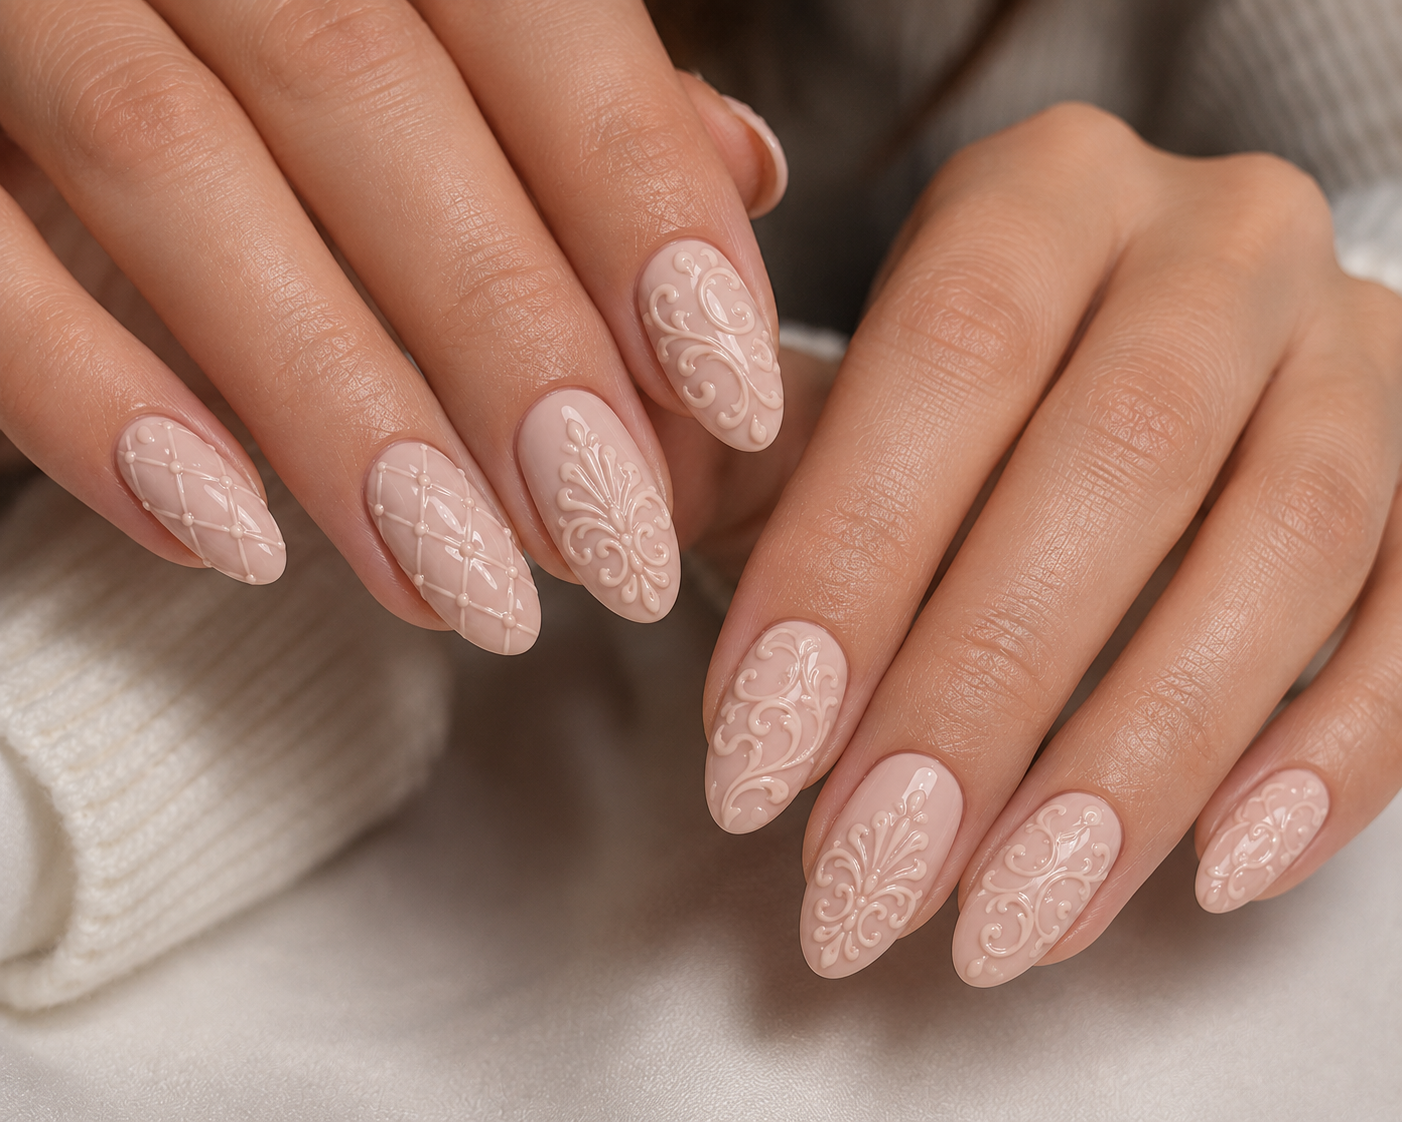
Embossed gel patterns do something completely different—they create soft raised textures that remind you of lace, quilted handbags, luxury wallpaper or embroidered fabric. They don't need glitter to feel expensive because the beauty comes from their texture.
This is one of those nail techniques that people often notice twice. First they admire the manicure, then they lean in and suddenly realise the design is actually raised.
If you love elegant nail art with a modern twist, this technique deserves a place in your collection.
What You Need
- Base coat
- Gel polish
- No-wipe top coat
- Thick embossing gel or builder gel
- Fine liner nail art brush
- Silicone detail tool (optional)
- UV/LED lamp
- Cuticle oil
Create Your Base Colour
Prepare your nails by shaping, buffing and removing every trace of dust.
Apply your base coat and cure.
Paint two thin coats of your chosen colour, curing each layer separately.
Soft nude, milky white, taupe, dusty rose, chocolate brown and deep emerald all work beautifully for embossed designs because they allow the raised texture to become the star.
Seal everything with a no-wipe top coat and cure completely.
Decide on Your Pattern
Choose one simple repeating design before you begin.
- Beautiful beginner-friendly embossed patterns include:
- Elegant swirls
- Lace-inspired curves
- Floral vines
- Tiny quilted diamonds
- Soft waves
- Delicate leaf patterns
- Luxury monograms
- Ribbon-inspired lines
Keeping the pattern consistent makes the finished manicure look far more professional.
Draw the Raised Design Slowly
Now the texture begins to appear.
Dip your fine liner brush into the thick embossing gel, picking up only a small amount. Too much gel can spread before curing and cause the design to lose its sharp edges.
Rest your painting hand on the table to keep it steady. Starting near the cuticle, gently pull the brush across the nail in one slow, confident movement. Let the brush glide naturally instead of pressing hard into the gel. The gel should sit on top of the nail like a raised thread rather than being flattened into the surface.
If you're creating lace, draw one curved line first, then return to add smaller connecting loops instead of trying to complete the entire pattern in one movement. For quilted designs, create the diagonal lines first, cure them for 15 seconds, then add the crossing lines afterwards. This keeps every raised section crisp instead of allowing the gel to merge together.
Work on one nail at a time. After finishing the pattern on each nail, flash cure it for around 15–20 seconds to lock every line into place before moving to the next finger.
Small, controlled sections always produce cleaner embossing than trying to rush through an entire hand.
Build More Height Without Losing Detail
Once the first layer has been flash cured, examine your design from the side. If you'd like a more luxurious embossed effect, simply trace over each cured line with another thin layer of embossing gel.
Don't make the second layer thicker than the first. Instead, follow the original lines carefully, allowing the height to build gradually. Two thin layers always look smoother than one heavy layer.
As you work, rotate the finger under your lamp or desk light. This helps you spot areas where the raised lines become uneven or begin to flatten. If a section spreads slightly before curing, use the tip of your liner brush or a silicone tool to gently guide it back into shape before placing it into the lamp.
Once every detail looks balanced, cure the nail fully according to the gel manufacturer's instructions.
The finished pattern should resemble delicate embroidery sitting proudly on the surface of the nail, with every raised line clean, even and beautifully defined.
Finish the Design
Because the raised texture is the feature, many nail artists leave the embossed pattern exactly as it is.
If you prefer extra shine, apply top coat only to the flat background areas, avoiding the raised design wherever possible to preserve its sculpted appearance.
Finish with nourishing cuticle oil.
Sofia's Little Secret
Embossed gel patterns are like wearing a beautifully tailored jacket.
They don't need loud colours or sparkling crystals to feel luxurious.
A soft nude manicure with one perfectly embossed accent nail often looks more expensive than a manicure covered in glitter.
Sometimes elegance isn't about what catches the eye first.
It's about the tiny details people discover when they look a little closer. ✨