Dot-to-Line Nails: Where Tiny Dots Become Elegant Movement
A practical Sofia K. technique tutorial on dot-to-line nail art and graceful flowing detail work.
Some nail designs catch your eye immediately.
Others invite you to look a little longer.
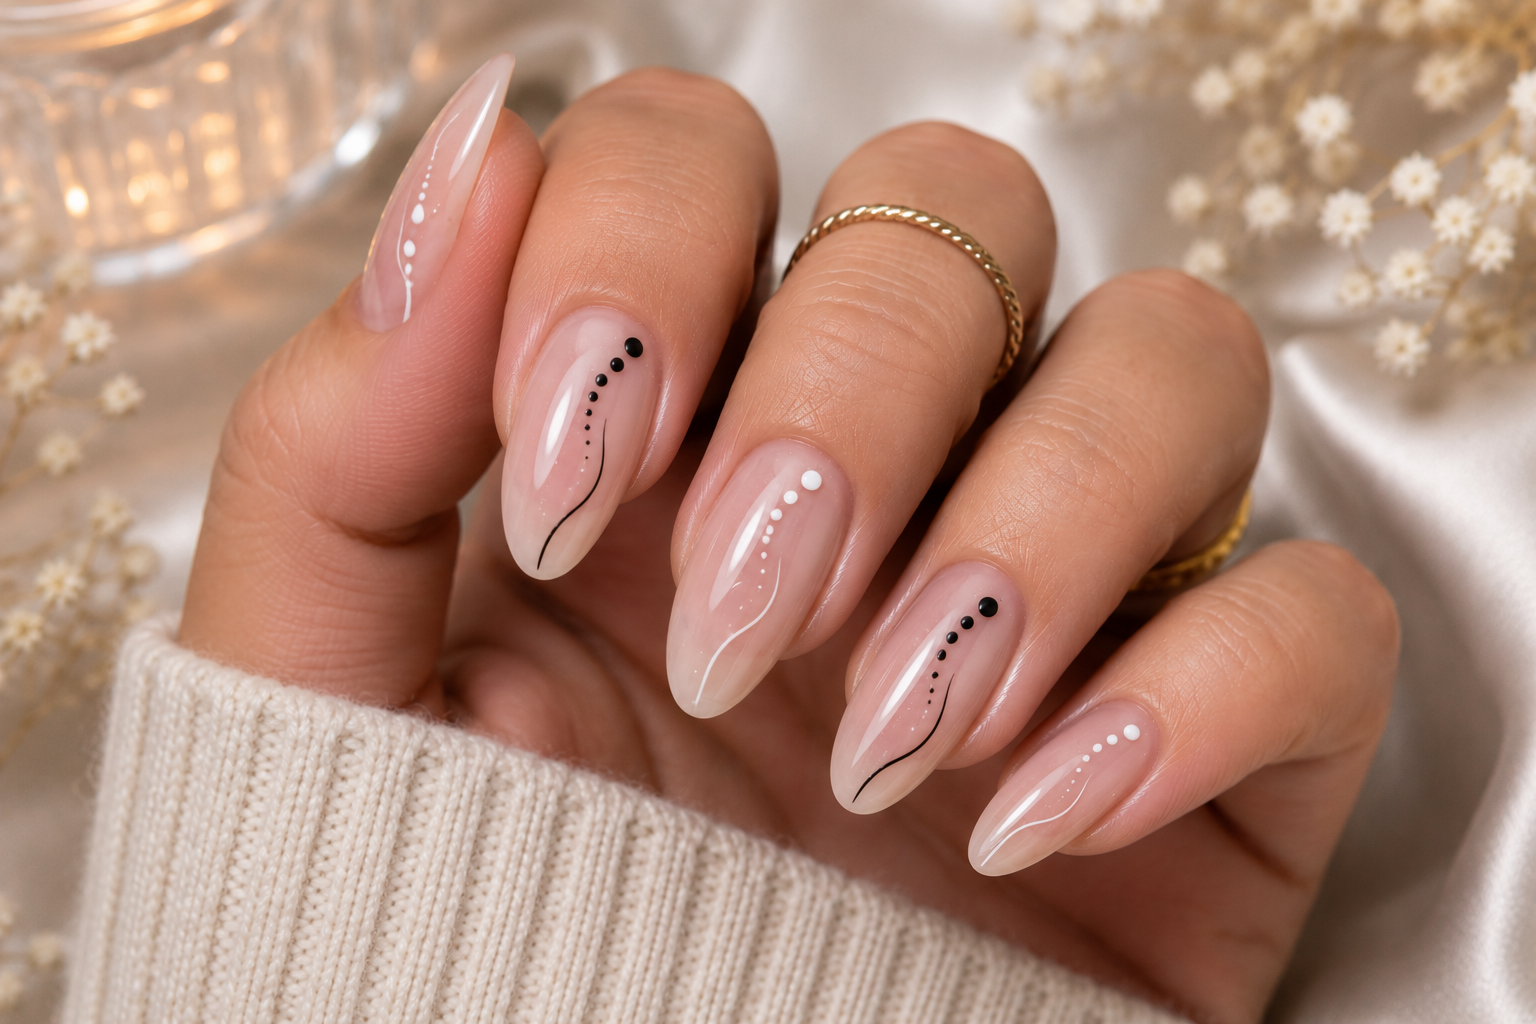
Dot-to-line nail art has that wonderful quality. It begins with the simplest of details—a tiny dot—and gently transforms into graceful flowing lines that seem to dance across the nail. The result feels modern, feminine and wonderfully sophisticated, perfect for women who love elegant nail art with a contemporary twist.
This is not simply a dotted manicure, nor is it only line art.
It is the beautiful moment where one becomes the other.
Because the most elegant journeys always begin with a single step... or in this case, a single dot.
What You Need
- Base coat
- Nude, milky pink, sheer beige or soft blush gel polish
- Fine liner brush
- Small dotting tool
- White, black or coloured gel paint
- High-gloss top coat
- Nail cleanser and lint-free wipes
- LED/UV lamp if using gel
Step 1 – Build a Calm Foundation
Apply your base coat and cure if necessary.
Follow with two thin coats of your chosen colour. Neutral shades create the perfect canvas because they allow both the dots and the delicate lines to remain the stars of the design.
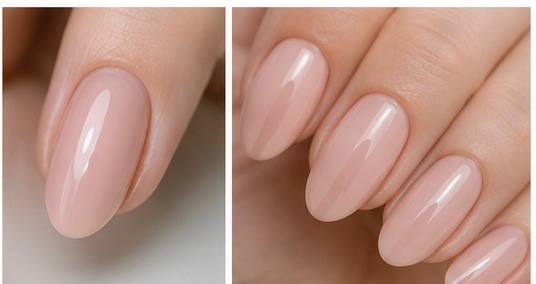
Sofia's Tip: Elegant details always shine brighter on a quiet background.
Step 2 – Decide Where the Design Will Travel
Before making your first mark, imagine the direction your pattern will follow.
Perhaps the design begins near the cuticle before flowing towards the tip, curves softly along one side of the nail, or travels diagonally from one corner to another.
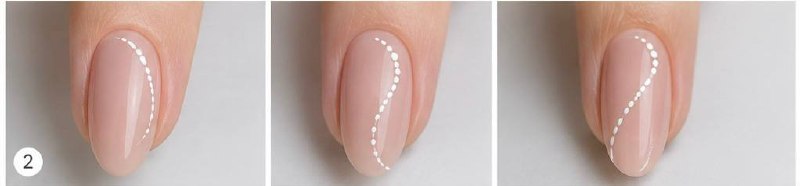
Avoid crossing too many lines.
One graceful journey always feels more luxurious than several competing paths.
Luxury rarely shouts.
Step 3 – Create the Dot Foundation
Using your dotting tool, place three to five dots on the nail.
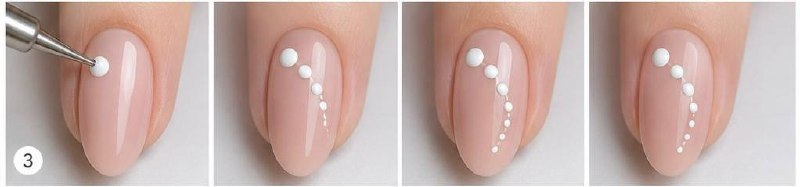
The largest dot should become the starting point of your design. Place it where you want the eye to begin. Then gradually reduce the size of each following dot as they travel along your chosen direction.
For example:
Place one large dot near the cuticle.
About 4–5 mm away, place a medium dot.
Continue with two or three smaller dots, leaving slightly smaller spaces between each one as they become smaller.
Do not arrange them in a perfectly straight line. Instead, allow them to follow a gentle curve. Think about how a ribbon naturally falls rather than how a ruler looks.
Now stop.
Before drawing anything, look at the nail from arm's length. Your dots alone should already create beautiful movement. If one dot feels too close or too large, remove it now and replace it before continuing.
Tiny details often become unforgettable.
Step 4 – Transform the Dots into Flowing Lines
This is where the magic happens.
Take your fine liner brush and load only a tiny amount of gel paint. Wipe any excess from both sides of the brush so the bristles form a sharp point.
Starting at the edge of your largest dot, gently pull the brush towards the second dot in one smooth movement. The line should become thinner as you move away from the larger dot.
Do not drag heavily across the nail.
Instead, almost let the brush glide over the surface using only the very tip.
Repeat this between each remaining dot. Every connecting line should become slightly finer than the previous one, creating a beautiful fading effect.
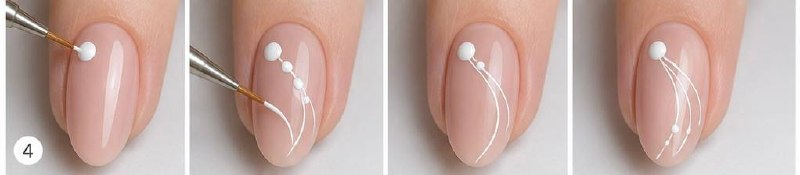
If you would like an even softer finish, allow the final line to continue just beyond the smallest dot, becoming almost hair-thin before lifting your brush away.
Should your line wobble, don't panic. Clean your brush, remove only that section while the gel is still uncured, and redraw it. One confident stroke almost always looks better than several hesitant ones.
Beautiful movement always beats perfect movement.
Step 5 – Add One Elegant Accent
Choose one accent nail and add a second tiny dot-to-line pattern travelling in a different direction.
If you enjoy subtle glamour, place one microscopic champagne-gold dot where the line begins.
Nothing more.
We've all looked at a beautiful line and thought, "Maybe it needs another one..."
Then suddenly the nail starts resembling London's Underground map.
Sometimes less really is more.
Step 6 – Seal Every Detail
Apply your glossy top coat using light pressure.
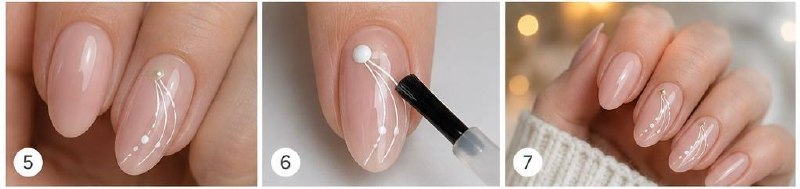
Float the brush across the design rather than pressing into it. This protects the fine lines and keeps every tiny detail beautifully crisp.
Confidence creates elegance.
Step 7 – Let the Design Flow with You
Turn your hand slowly beneath natural light.
Notice how your eyes naturally follow the movement from dot to line without even thinking about it.
That effortless flow is what makes this technique feel so sophisticated. It is clean, modern and graceful enough to accompany everything from a business meeting to a candlelit dinner.
The design moves because you move.
And that is where its beauty lives.
Sofia's Little Secret 💕
Life rarely follows perfectly straight lines.
Sometimes it begins with one tiny decision, one unexpected conversation, one brave step... and before we realise it, that little beginning has become something beautiful.
Dot-to-line nails tell exactly that story. Every graceful line starts with one simple dot, just as every confident woman starts by believing in herself one small moment at a time.
So wear this manicure with pride. Let every elegant curve remind you that your own journey doesn't have to be perfect to become extraordinary. Sometimes the most beautiful destinations begin with the smallest detail. 💕