Reverse French Manicure: A Modern Twist That Frames the Nail with Elegance
A practical Sofia K. technique tutorial on reverse french manicure: a modern twist that frames the nail with elegance.
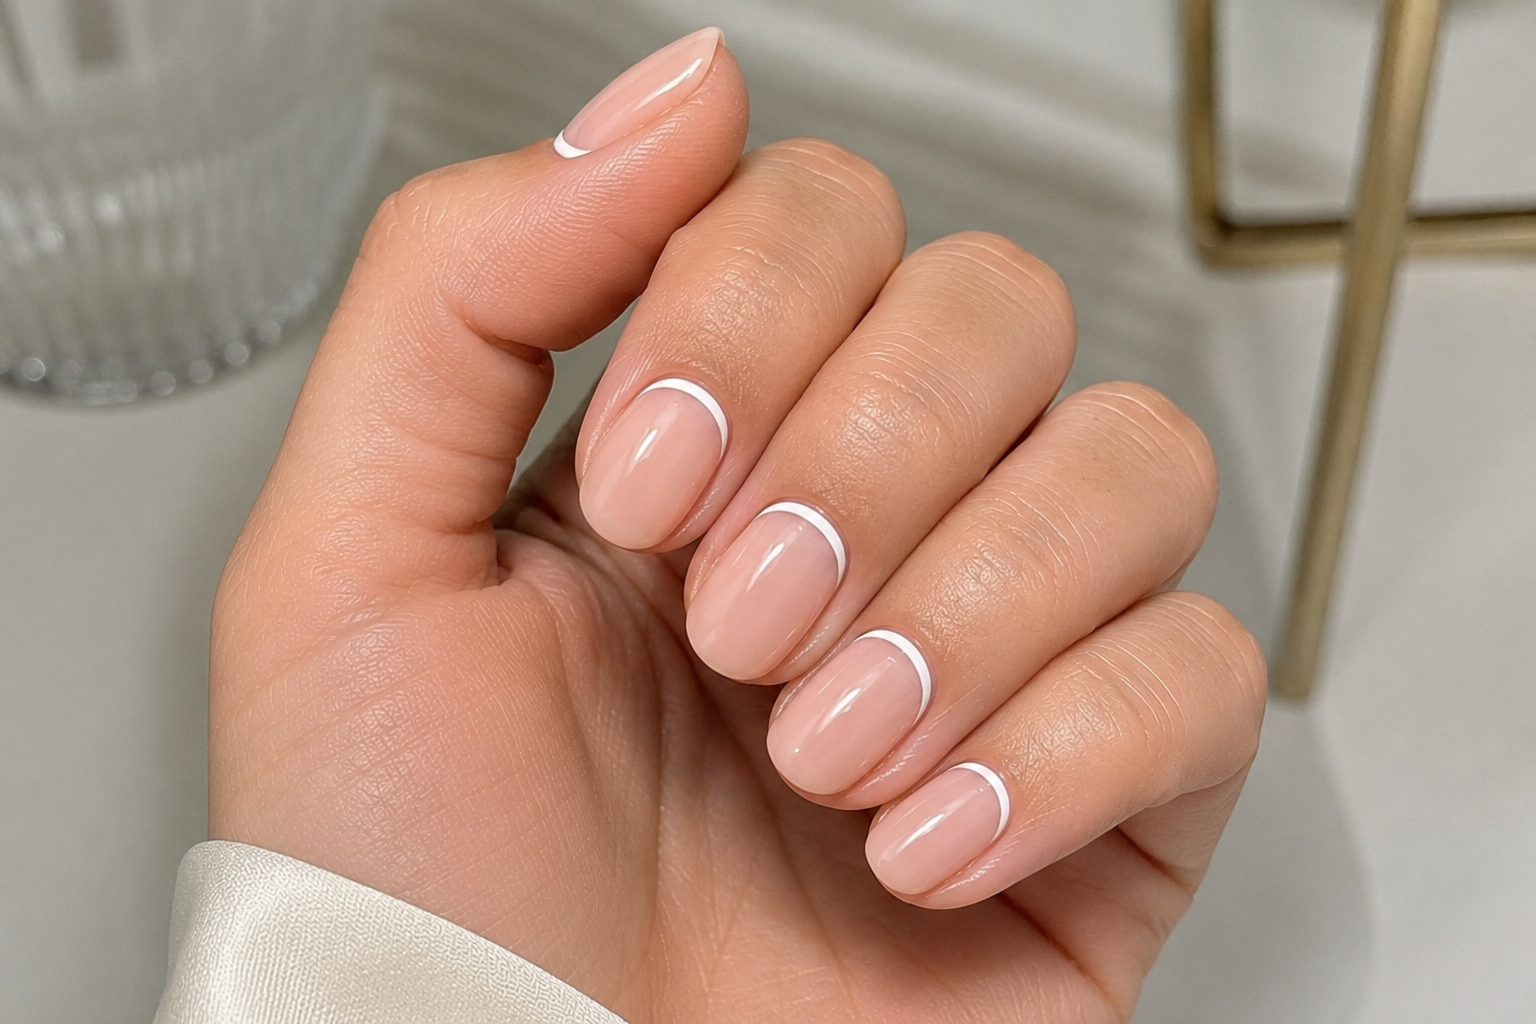
The beauty of the French manicure has always been its simplicity, but nail art is constantly finding new ways to reinterpret timeless classics. The Reverse French manicure takes the familiar idea of highlighting the nail and turns it upside down—quite literally.
Instead of drawing attention to the tip, this design celebrates the cuticle area with a graceful curved line that follows the natural shape of the nail. It feels contemporary, elegant, and surprisingly versatile.
I have always liked the Reverse French because it offers something different without becoming too bold. It works beautifully for someone who enjoys minimalist nail art but wants a manicure that feels fresh and modern. Whether you are attending a formal dinner, celebrating a wedding, heading to the office, or simply enjoying a weekend away, this design adapts effortlessly.
As fashion designer Christian Dior once said:
"Real elegance is everywhere, especially in the things that don't show."
The Reverse French captures that idea perfectly. Its beauty comes from subtle detail rather than dramatic decoration.
What Is a Reverse French Manicure?
A Reverse French manicure highlights the lunula area—the curved base of the nail near the cuticle—instead of the free edge.
Rather than painting a white tip, a delicate curved line follows the natural shape of the cuticle, leaving the rest of the nail in a soft nude, sheer pink, or another chosen colour.
Popular combinations include:
- Nude with a white reverse line
- Milky pink with gold detailing
- Sheer beige with silver accents
- Nude with black fine lining
- Soft pink with chrome detailing
The result is modern, clean, and sophisticated.
What You Need
- Nail file (180/240 grit)
- Buffer
- Cuticle pusher
- Nail cleanser
- Lint-free wipes
- Dehydrator
- Primer (if required)
- Base coat
- Sheer nude or pink polish
- White, metallic, or coloured gel paint
- Ultra-fine liner brush
- Top coat
- Cuticle oil
Step 1 – Prepare the Nails Carefully
Preparation is especially important because the design draws attention directly to the cuticle area.
Shape every nail evenly.
Gently push back the cuticles, remove any non-living tissue, lightly buff the nail plate, and cleanse away dust and oils.
The cleaner the cuticle line, the more elegant the finished manicure will appear.
Step 2 – Apply the Base Coat
Apply a thin layer of base coat over every nail.
Cure if using gel products.
Avoid applying thick layers, as they can make detailed line work more difficult.
Step 3 – Apply the Base Colour
Choose a natural-looking shade such as:
- Milky nude
- Sheer pink
- Soft beige
- Natural peach
Apply one or two thin coats.
The Reverse French looks most elegant when the base colour enhances the natural nail rather than covering it completely.
Step 4 – Create the Reverse French Line
Using a fine liner brush:
- Start at one side of the cuticle.
- Follow the natural curve around the base of the nail.
- Finish at the opposite side.
Keep the line smooth, even, and delicate.
The line should frame the cuticle without touching the surrounding skin.
If using metallic colours, work slowly to maintain a consistent width throughout the curve.
Step 5 – Perfect the Curve
Before curing or sealing the design, compare every nail.
Check that:
- Every curve follows the natural cuticle shape.
- The line thickness remains consistent.
- Both hands match.
- The curves begin and end at similar positions.
Small differences become much more noticeable in minimalist designs.
Step 6 – Seal with Top Coat
Apply a high-gloss top coat over the entire nail.
Float the brush gently over the design without pressing too firmly.
Cap the free edge to improve wear and durability.
The glossy finish gives the manicure a beautifully polished appearance.
Step 7 – Nourish the Cuticles
Finish by massaging cuticle oil around every nail.
Because the Reverse French places the focus near the cuticle, healthy skin plays an important role in the overall look.
Even the finest nail art appears more luxurious when the surrounding skin is well cared for.
Professional Tips
- An ultra-fine liner brush gives the greatest control.
- Rotate the client's finger instead of twisting your hand.
- Work with very little product on the brush.
- Keep every reverse curve the same width.
- Metallic gold creates an elegant jewellery-inspired finish.
- Practice drawing the curve on paper before painting directly onto nails.
Common Mistakes
- Uneven curves between fingers.
- Thick, heavy lines around the cuticle.
- Flooding product into the cuticle area.
- Inconsistent spacing from the cuticle.
- Using opaque base colours that overpower the minimalist design.
- Forgetting to compare both hands before finishing.
Remember, a Reverse French should frame the nail—not dominate it.
Interesting Facts
- The Reverse French manicure became increasingly popular during the minimalist nail art movement of the 2010s as designers explored new ways to reinterpret the classic French manicure.
- Some nail artists refer to this design as a "half-moon manicure" when the highlighted area closely follows the natural lunula at the base of the nail.
- Metallic gold Reverse French designs are especially popular during wedding season because they complement engagement rings and bracelets beautifully.
- The design works equally well on short natural nails and long sculpted extensions, making it one of the most adaptable modern French variations.
- Because the detail sits near the cuticle, precise preparation and clean cuticle work are essential for achieving a professional finish.
Final Thoughts
The Reverse French manicure reminds us that elegance can be found by simply changing our perspective. By moving the decorative detail from the tip to the base of the nail, this design feels fresh while still respecting the clean simplicity that has made French manicures so enduring.
It is a style that transitions effortlessly from everyday wear to special occasions. Quietly sophisticated, modern without being extravagant, and beautifully balanced, the Reverse French proves that sometimes the smallest change creates the biggest impression.