3D Gel Dot Nails: Tiny Raised Details with a Luxury Feeling
A practical Sofia K. technique tutorial on 3D gel dot nails, raised glossy details, and luxury textured placement.
Some manicures are made to be seen.
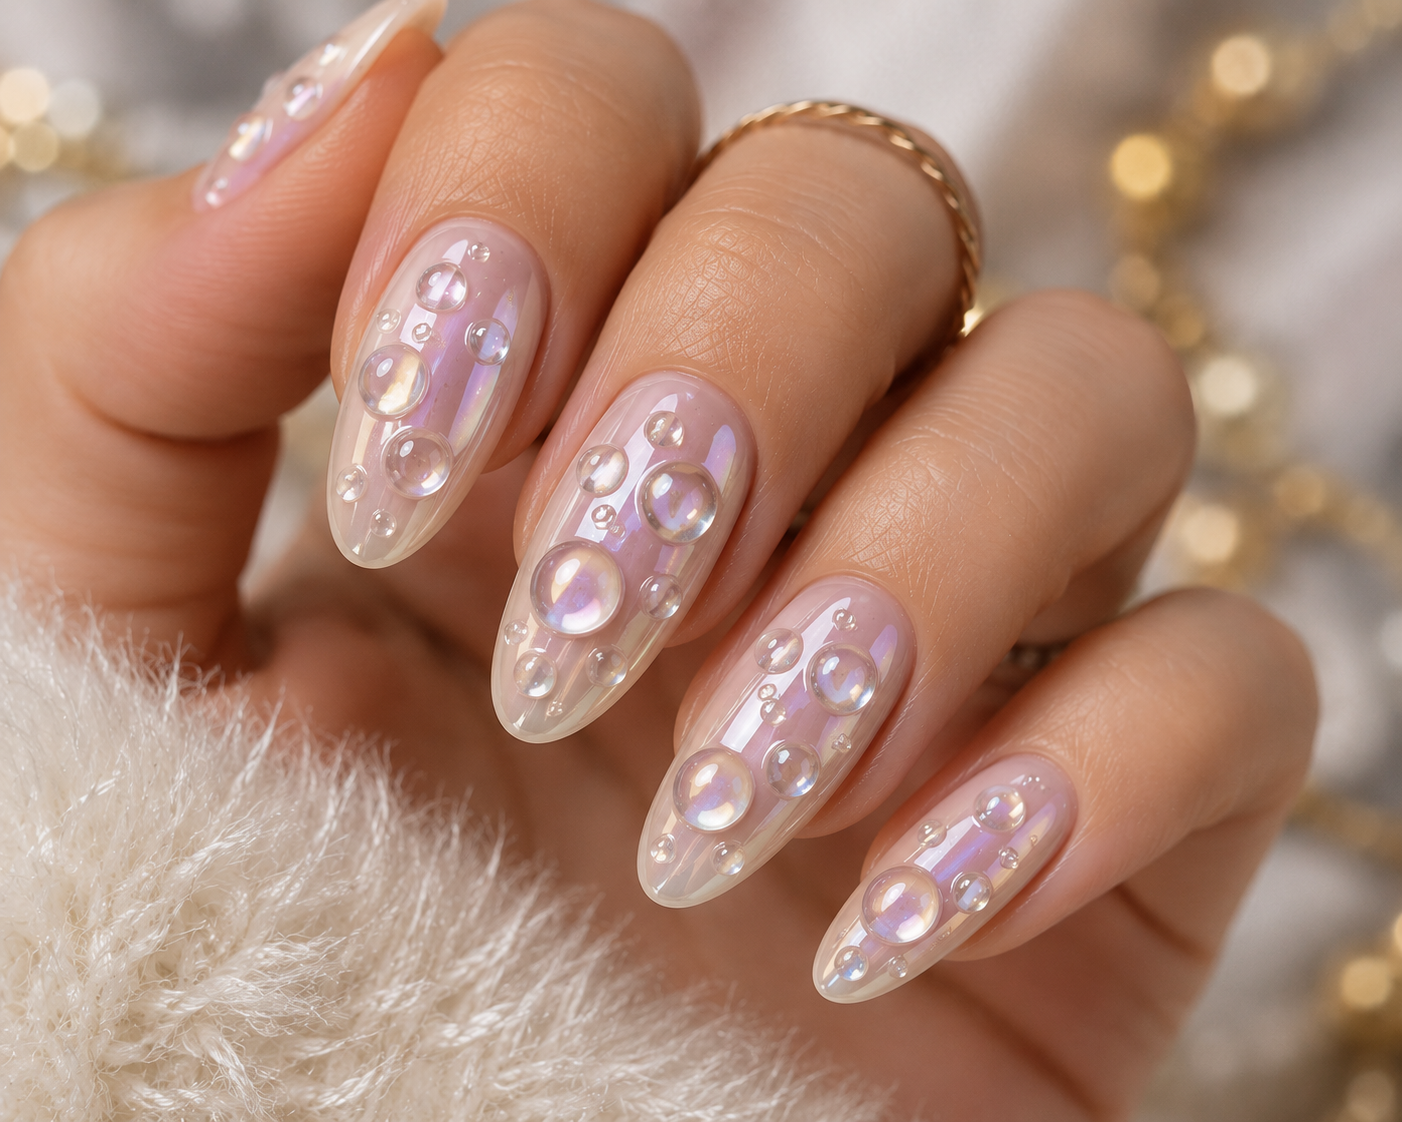
Others are made to be noticed slowly, when the light touches them from the side and every tiny detail comes alive. 3D gel dots belong to this second, more delicious category. They are small, rounded, glossy details that sit gently above the nail surface, almost like little drops of glass.
They feel elegant, playful, and quietly expensive. Perfect for women who love texture, but do not want a manicure that becomes too loud.
Luxury rarely shouts. Sometimes it simply catches the light.
What You Need
- Base coat
- Nude, milky pink, sheer beige, or soft blush gel polish
- Thick builder gel or clear 3D gel
- Dotting tool in small and medium sizes
- Fine liner brush
- LED/UV lamp
- High-gloss top coat
- Nail cleanser and lint-free wipes
Step 1 – Create a Smooth Base
Apply your base coat and cure it under the lamp.
Then apply two thin coats of your chosen gel colour, curing each layer fully. A soft neutral base works beautifully because it allows the raised dots to look delicate and expensive instead of heavy.
Sofia's Tip: A 3D detail needs a calm background. Think of it like pearls on silk.
Step 2 – Decide Where the Texture Will Live
Before touching the 3D gel, plan your dot placement.
For an elegant result, choose one side of the nail, a small curve near the cuticle, or one accent nail with more dots. Do not cover the full nail unless you want a very dramatic look.
Empty space is beautiful too.
The raised dots need air around them so they feel intentional, not crowded.
Step 3 – Pick Up the Right Amount of 3D Gel
This is the important part.
Dip your dotting tool gently into the thick clear gel. You want a small rounded bead sitting on the end of the tool, not a long string of gel.
If the gel stretches like chewing gum when you lift it, wait one second and twist the tool slowly before moving to the nail. This helps the gel break cleanly.
Place the bead onto the nail with a soft touch. Do not press down hard, because pressing will flatten the dot. Instead, touch the nail lightly, pause for half a second, and lift the tool straight up.
The gel should stay behind as a small rounded dome.
If the dot looks too flat, you used too much pressure. If it has a little tail, your tool lifted too quickly or at an angle.
Beautiful movement always beats rushed movement.
Step 4 – Build the 3D Dots Slowly
Work with only three to five dots at a time.
Place one dot, then the next, leaving enough space so they do not melt into each other. 3D gel can slowly spread before curing, especially if the room is warm.
After placing a small group, flash cure for 10–15 seconds. This means you cure them only briefly to hold their shape before continuing. Then add the next group of dots.
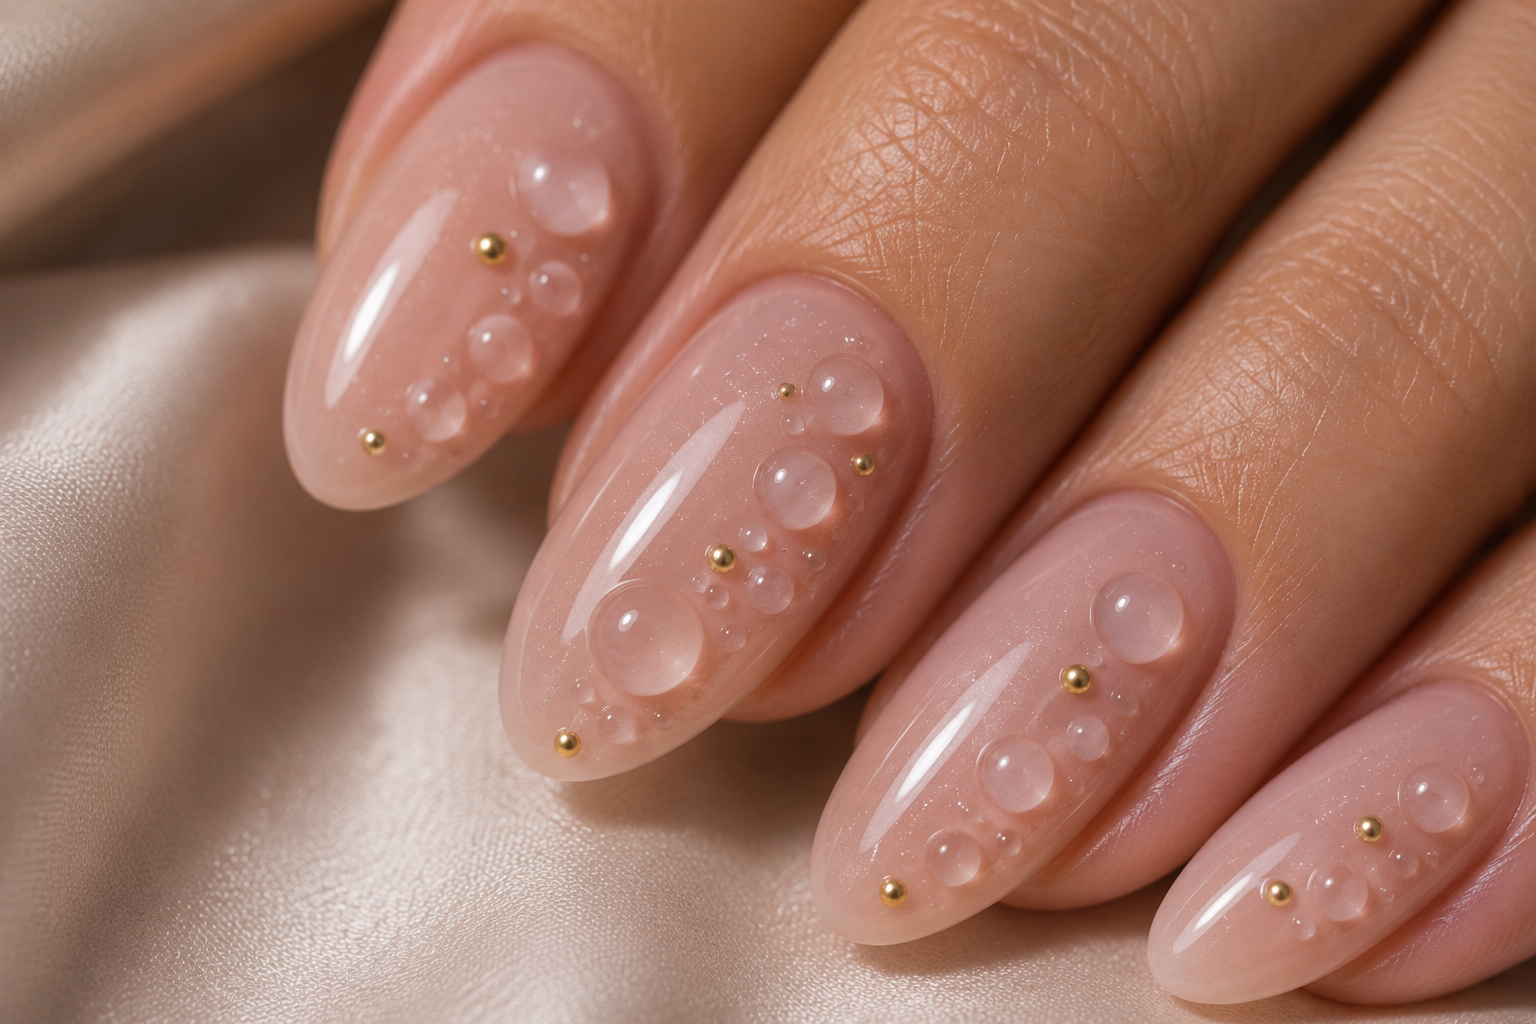
For different sizes, use different pressure and gel amounts. A tiny dot needs only the smallest touch of gel. A larger dot needs a slightly bigger bead, but still no pressing.
If you want a pearl-like raised effect, place the dot, let it settle for two seconds, then cure. If you want a taller bubble effect, add a second tiny bead directly on top after the first one is flash cured.
This is how the design becomes 3D without becoming messy.
Tiny details often become unforgettable.
Step 5 – Keep the Pattern Elegant
Now look at the whole nail.
If the dots are all the same size and too evenly spaced, the design may feel stiff. Add one or two smaller dots near a larger one to create softer movement.
For a luxury finish, keep most dots clear and add only one or two white or champagne-gold raised dots on an accent nail.
We've all said, "Just one more 3D dot," and suddenly the nail looks like it packed for a three-week holiday with extra luggage.
Sometimes less really is more.
Step 6 – Seal Without Losing the Shape
This step must be gentle.
Apply top coat around the raised dots first, using the brush lightly. Then glide over the top of the dots with almost no pressure.
Do not flood the nail with too much top coat, because it can soften the 3D effect and make the dots look less raised.
Cure fully under the lamp.
Confidence creates elegance, but patience protects it.
Step 7 – Check the Finish from the Side
After curing, turn the nail sideways under the light.
You should see tiny rounded domes sitting neatly on the surface. They should feel smooth, glossy, and intentional, not sharp or rough.
If one dot feels uneven, add a little top coat only to that area and cure again.
The final look should feel like delicate drops of glass on a soft manicure.
Elegant, tactile, and quietly playful.
Sofia's Little Secret 💕
3D gel dots remind me that beauty is not always flat and perfect. Sometimes it has texture. It has little rises, little surprises, little moments that catch the light when nobody expects it.
And women are like this too. The most elegant ones are not without character. They have depth, softness, humour, confidence, and stories that make them unforgettable.
Wear your 3D dots as a small celebration of your own dimension. You are not here to be plain. You are here to be luminous, alive, and beautifully yourself. 💕