Some summer evenings begin in peach and finish in lilac. You notice it while the table is being set, when the sun is still warm on your shoulders but the first little lights are appearing around the terrace.
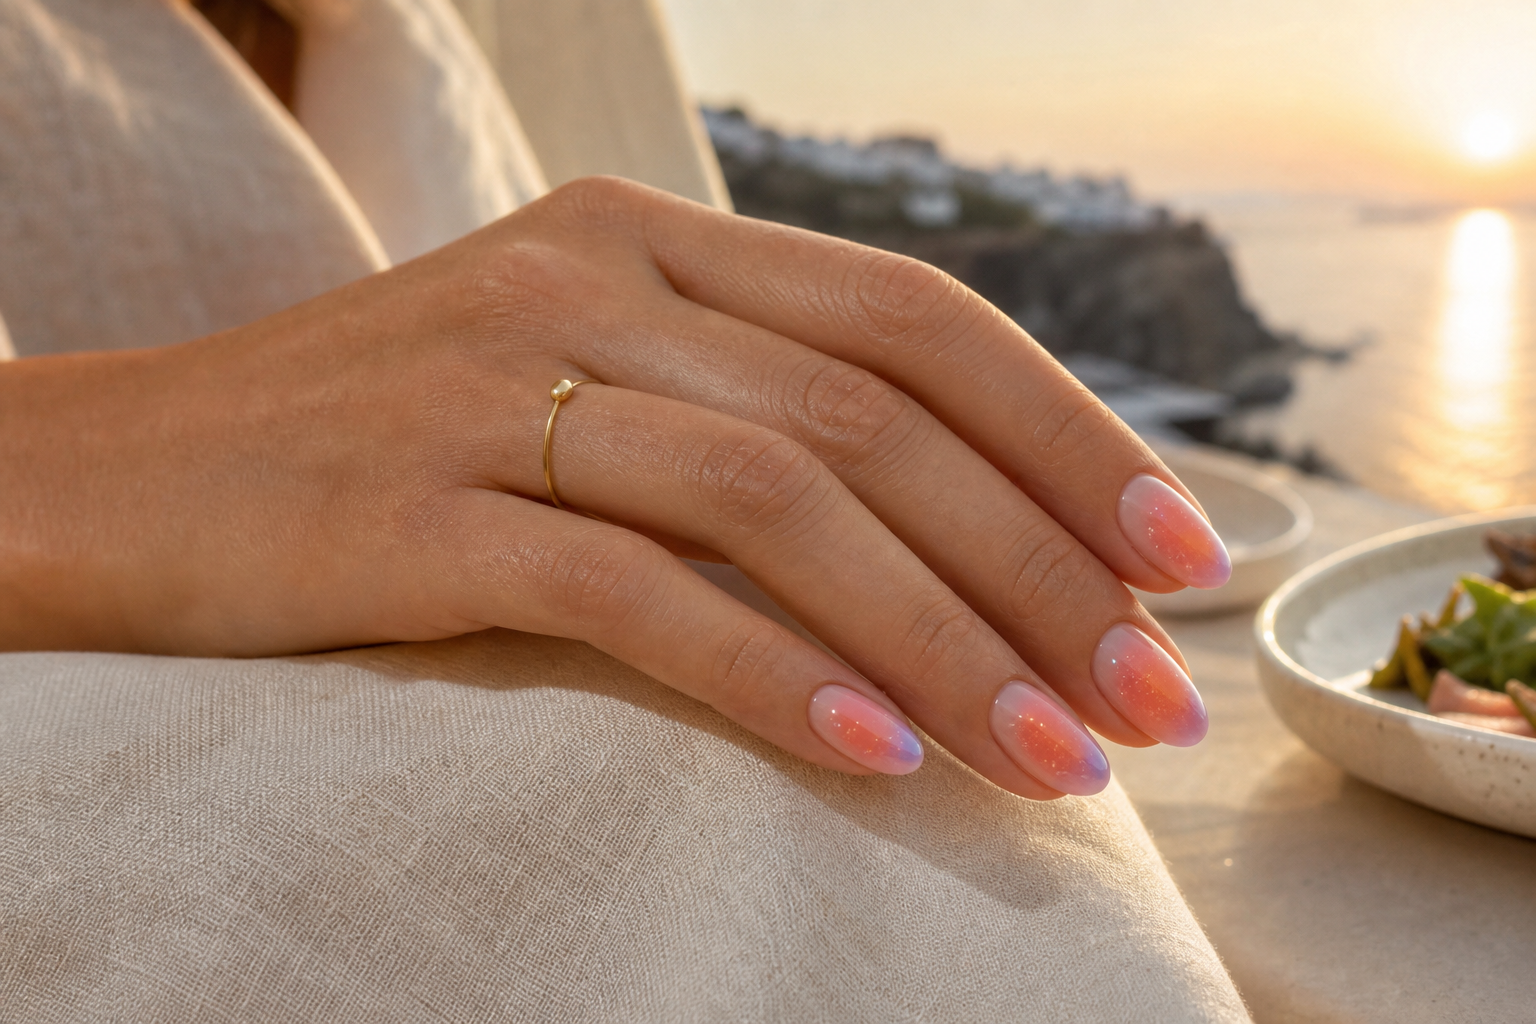
Sunset aura nails carry this colour change onto the hand. A soft halo of coral melts into peach, then fades gently toward a sheer lilac edge. Nothing is drawn with a hard line. The colours seem to float into one another, like the sky has forgotten exactly where one shade should finish.
This manicure is beautiful for an island holiday, a wedding guest look, a girls’ dinner or a summer party where your hands will keep meeting glasses, jewellery and photographs. It feels special, but it does not fight a printed dress or become too serious for warm weather.
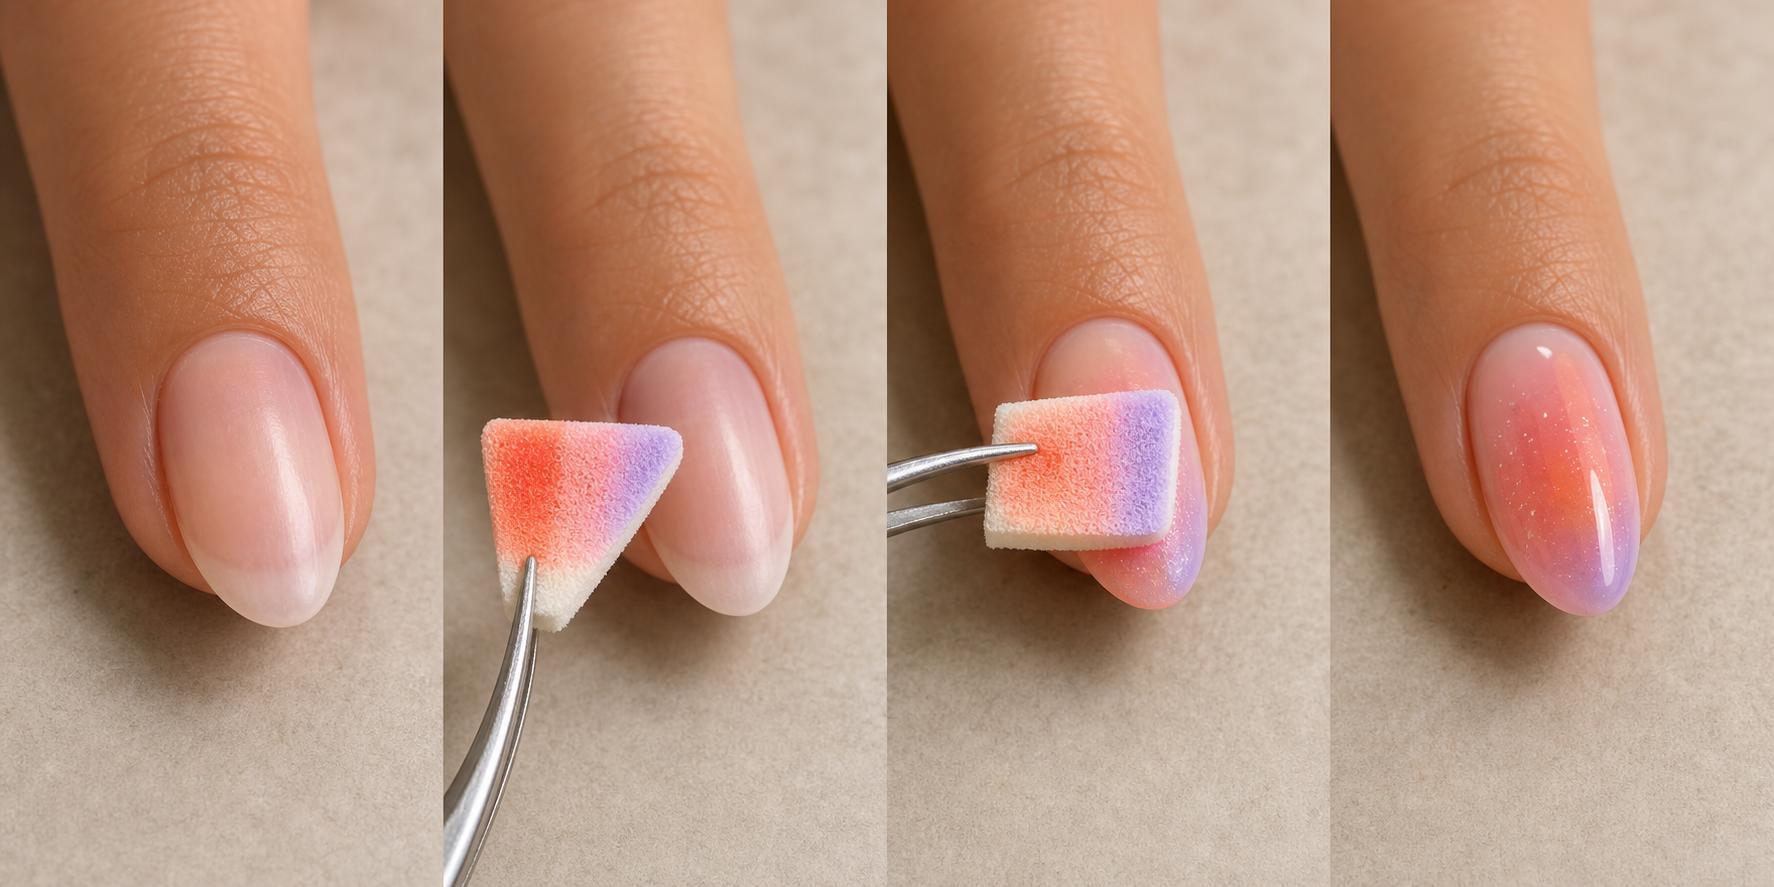
The technique uses a small makeup sponge to press very thin layers of colour over a pale base. You do not need to paint a perfect sunset. In fact, a little variation between nails makes the result more alive. One nail may hold more coral, another more lilac, exactly as the evening sky changes when you turn your head.
If you have never tried a sponge gradient, do not worry. The first press can look unimpressive, almost like the manicure has changed its mind. The glow arrives slowly, through light layers. This is a patient little technique, but not a frightening one.
What You’ll Need
- Nail file and gentle buffer
- Base coat
- Sheer milky pink or pale nude gel colour
- Peach, coral and soft lilac gel colours
- A clean, dense makeup sponge cut into small pieces
- Fine detail brush
- Flat cleanup brush and suitable cleanser
- Top coat
- Lint-free wipes and cuticle oil
**Optional:** liquid latex or skin barrier for easier cleanup, a tiny amount of fine gold shimmer, and tweezers for holding the sponge.
Step 1 — Prepare a Calm Base
Shape the nails into a short oval, soft almond or neat rounded square. Gently remove surface shine if your system requires it, clear away dust and apply base coat. Cure according to the instructions for the gel you use. Add one thin coat of sheer milky pink or pale nude and cure it. If the nail still looks uneven, add a second very thin coat. The base should look clean and luminous, not thick or chalky, because some of it will remain visible around the aura.
Step 2 — Plan Your Sunset
Choose one colour to lead. Peach feels gentle and suits daytime weddings; coral gives more holiday energy; lilac creates a cooler evening mood. For this design, place coral in the centre, peach around it and lilac near one side or the free edge. Do not try to fit three perfect circles onto every nail. Think of a soft diagonal movement instead. Before touching the nail, place tiny drops of the colours on a palette and hold them beside the hand. If one shade shouts while the others disappear, soften it with a little of the base colour.
Step 3 — Build the Aura with the Sponge
Cut a piece of dense makeup sponge slightly larger than the nail. A piece around the size of your thumbnail is easy to control. Hold it with tweezers if your fingers keep touching the colour. On the flat sponge surface, paint a coral patch about the size of a lentil. Place peach directly beside it so the edges just meet, then add a smaller lilac patch beside the peach. The gel should dampen the sponge, not soak through it. Too much product gives a thick, bubbly print.
Rest your working hand on the table and support the client finger—or your own finger—with the other hand. Bring the sponge down almost parallel to the nail. Press once with light, even pressure, then lift straight up. Do not drag sideways. The first impression will be pale and slightly textured; this is normal. Rotate the finger a little instead of twisting your wrist, and make one second gentle press where the colour needs to travel. Cure this light layer.
Reload the sponge with smaller amounts in the same order. For the second layer, place the coral closer to the centre and let peach overlap its edge. Use two or three soft taps, lifting fully between each one. If you bounce rapidly, the sponge can pull colour back off the nail and leave tiny empty spots. If the aura reaches the cuticle too heavily, stop. Do not keep tapping and hope it will become softer. Clean the edge with a flat brush before curing. Beginners often press harder because the colour looks faint, but pressure does not create brightness; thin repeated layers do.
Step 4 — Refine the Glow and Correct the Shape
After two sponge layers, look at each nail from directly above and then from both side angles. The centre should be visible, but the border should not resemble a stamped circle. If it looks too round, take a clean sponge corner with a whisper of peach and tap beyond one edge, stretching the halo diagonally. If coral has taken over, mix a pin-sized amount of the milky base with peach on your palette and float this softened shade around the strong area.
Small sponge holes are easy to correct. Use a fine brush, pick up almost no colour and pat into the gap with the side of the bristles. Do not draw a solid patch. You are replacing the missing haze, not painting a dot. For a smoother transition, use the cleanest side of the sponge and make one feather-light press over the meeting point of two colours. Cure before the surface has time to move.
Now compare all five nails together. They should feel like one sunset, but they do not need identical maps. Keep the thumb and middle finger slightly stronger; leave the little finger softer so the hand has rhythm. If you want shimmer, touch a nearly dry detail brush into fine gold and place only a few particles near the coral centre. Check the nail under ordinary room light as well as your lamp. Strong task lighting can hide harsh edges that become obvious later at dinner. You are finished when the colours look blended from arm’s length and still clean when viewed closely.
Step 5 — Seal the Evening Light
Apply top coat with gentle floating strokes so the brush does not disturb the gradient. Cover the entire surface and seal the free edge, then cure fully. Clean any remaining colour from the surrounding skin and check that no gel has cured onto it. Finish with cuticle oil and massage it softly around the nail. The shine should make the colours look deeper, as if the little sunset has just met the sea.
Sofia’s Little Secret
I love this manicure because it does not demand one particular kind of summer woman. It can sit beside a linen shirt at breakfast, a bridesmaid dress in the afternoon or a glass of wine when the island becomes quiet. The colours change their personality with you.
Do not worry if your two hands are not identical. Real sunsets are never copied from one evening to the next, and this small difference gives the manicure its charm. Let one nail carry more coral because it makes you happy. Let another stay soft because your ring already brings enough light.
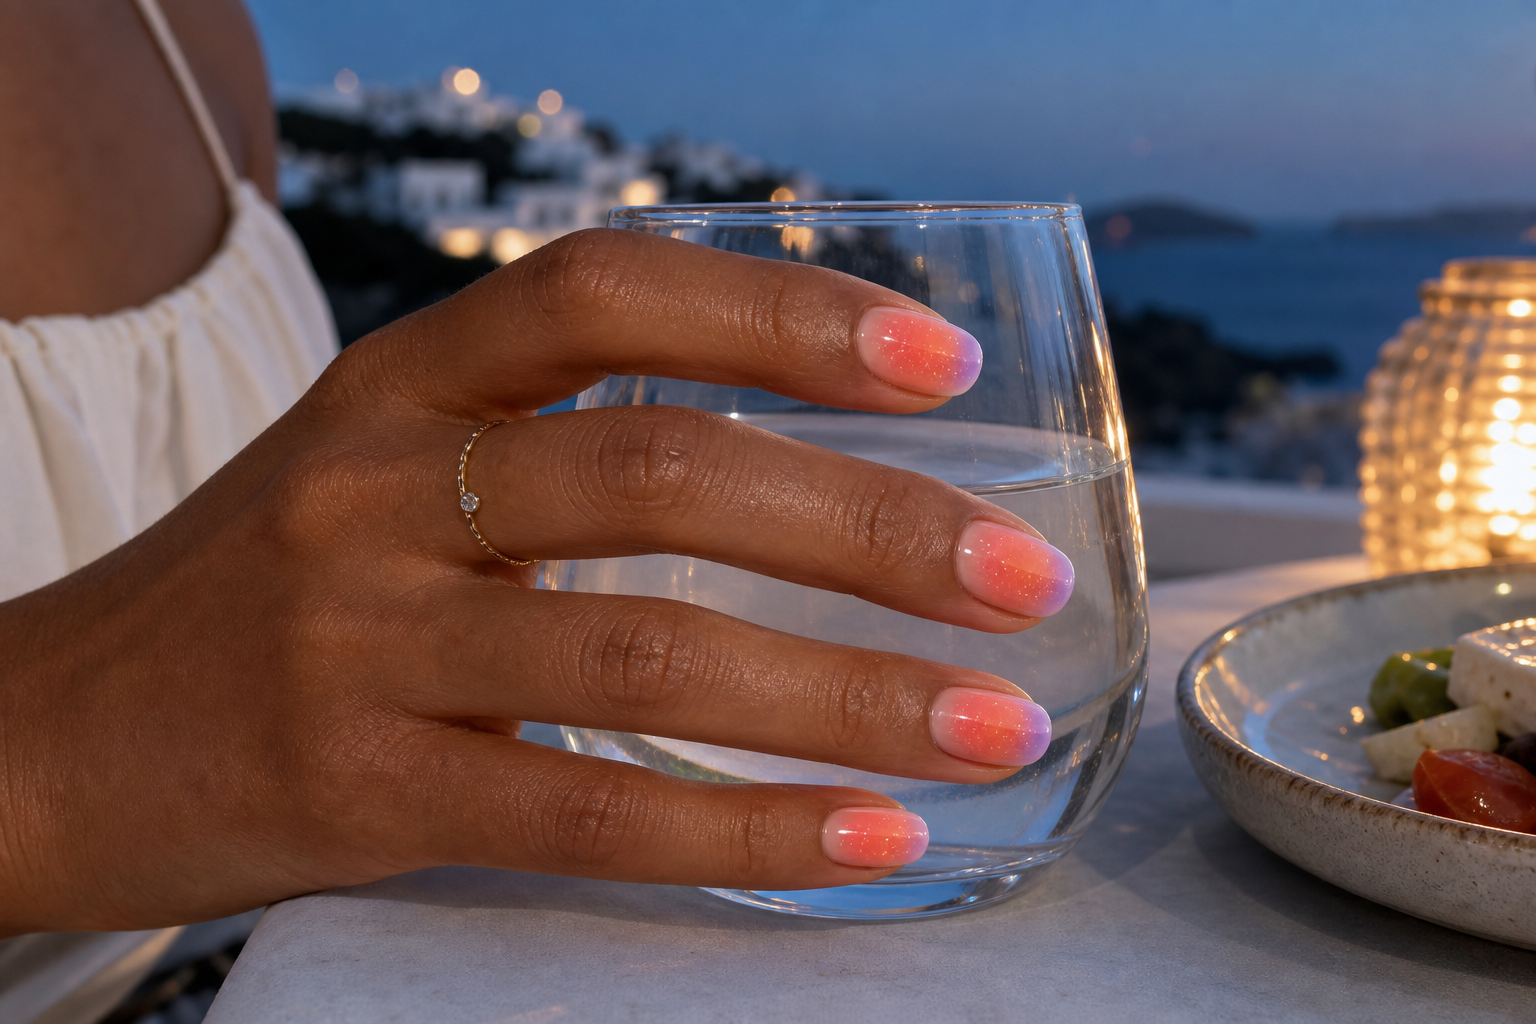
The sweetest moment will come later, not at the nail table. It will come when you lift your hand during dinner and suddenly see peach, lilac and gold under the warm lamps. For one second, you will remember the sky from your favourite holiday—and confidence will feel very close to your fingertips. ✨